Posts

Showing posts with the label food preservation

Making Garlic Scape Salt

Image
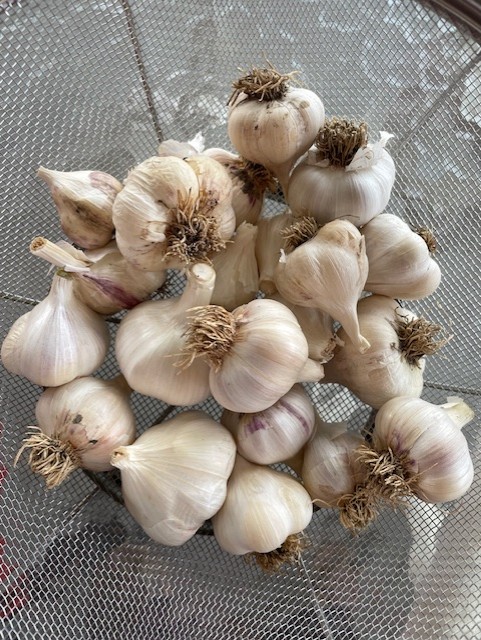
A couple of weeks ago we were given a bag of garlic scapes. We tried garlic scapes last year when we grew our own garlic. That first year, we cut them up into small rounds and used them in stir fry. They gave it a nice flavor. This year, we decided to try garlic scape salt. What are Garlic Scapes?  Garlic scapes are the long, curly central stalk that grows from the bulb of hardneck garlic plants. This stalk must be pulled or cut in order for the garlic bulb to grow larger. Garlic scapes have a mild garlic flavor and can be used to flavor dishes just like garlic. Garlic scapes Garlic scapes can be cut up and used in dishes such as stir fries, eggs, and casseroles. They can be used to make a pesto. They can also be used to make a garlic scape infused oil and garlic flavored salt. Because we love our food well seasoned, we opted to make a batch of garlic scape salt with the majority of the scapes and freeze the rest for later use. Making Garlic Scape Salt We followed the Homemade Garl...

Project Updates - Summer 2025

It is always difficult to remember everything we do in between updates, but here is a decent representative list of the projects we have been working on since May: Gardening Harvested Parsley, Basil, Mustard Greens, and Tomatoes from the AeroGarden Harvested Strawberries, Jalapenos, and Anaheim Peppers Planted Jerusalem Artichokes (Sunchokes) Growing (or attempting to grow!) a Variety of Produce in the Regular Garden Growing Tomatoes and Garden Huckleberries in the Greenhouse Canning Serviceberry Syrup Hawthorn Jam Serviceberry/Hawthorn Berry Juice Freezing Eggs (raw, scrambled)  Serviceberries Oregon Grapes Cherries Pear Butter Dehydrator/Air Drying Herbs for Tea - Mint (orange, sweet, chocolate), Rose Petals, Lemon Balm, Plantain Culinary Herbs - Basil, Parsley, Oregano, Tarragon Medicinal Herbs - St. John's Wort, Comfrey, Plantain, Calendula, Yarrow, Feverfew Other - Day Lily, Mushrooms Other Homestead Projects Rendering Lard & Tallow Vanilla Extract Sewing - modifying the n...

Ideas for Preserving Cherries

Image
Cherries can be canned, but I have to admit that they are not our favorite fruit when canned plain. If, like us, you are looking for new ways to preserve your cherries, try some of the delicious ideas below. Canning Cherry Barbecue Sauce One of our favorite ways to use sweet cherries is cherry barbecue sauce. We are sauce afficionados at our house. One year when we were blessed with a large amount of cherries, but no tomatoes, we decided to try this recipe. It is a bit different, of course, than traditional barbecue sauce, but it is really flavorful. You can find the recipe on our website here: https://www.preppedliving.com/home/projects-recipes/recipes/cherry-bbq-sauce Cherry BBQ Sauce Cherry Pie Filling This is our favorite project to do with tart pie cherries. They look so beautiful in the jars and make pie baking so easy. One quart jar makes a 9 inch pie. You can use the pie filling for cherry crisp or cherry cobbler as well. If making a 9x13 baking dish of cobbler or crisp...

Project Updates - Spring 2025

Image
Here are some of the things we have been up to since the last update in February: Gardening Installed the AeroGarden Set-up a Greenhouse  Installed New Easy-up Fencing Planted Onions Food Preservation  Canned Blueberry Juice Canned Potatoes Canned Pineapple Juice Canned Apple-pear Sauce Dehydrated Onions Froze Onions Other Homestead Projects Finished the Lap Quilt Learned to Darn Socks Made Remineralizing Tooth Powder Made Homemade Deodorant Waterglassed Eggs Made Homemade Curry Powder Installed Pantry Shelving Organized the Pantry Made Draft Stoppers   New Website Articles DIY Tooth Powder DIY Draft Stoppers Energy Bites What projects have you been working on this spring? We would love to hear your updates as well!

Using Water-glassed Eggs

Image
Have you tried water-glassing eggs? We water-glassed eggs last year and have been experimenting with the different batches since. Water-glassed eggs Batch 1 -  The first time we used the water-glassed eggs, we opened a batch that was about six months old. The eggs looked good on the outside. As we used them over the course of several days, we discovered two of them were not good on the inside. We tossed those. The others were fine and we used them both for baking and for cooking. The flavor was good, even in scrambled eggs. You couldn't tell from the flavor that they had been water-glassed. The yolk does become more fragile, however, and is more likely to break. My husband didn't like cooking with them due to the fragility of the interior. They cook just fine in baked goods, however. Batch 2 -  The second batch we used was maybe seven months old. A couple of the eggs apparently had cracks that were not visible when we water-glassed them and some of the interior had seeped out....

Rendering Tallow

Image
We had tallow in the freezer that we needed to use and decided to render it for cooking and soap making. We frequently render lard, but had rendered tallow only once before. The first tallow we rendered had a rather strong odor and taste, so after doing some reading, we opted to try both wet rendering and double rendering it to see if it made a difference.  Two Methods to Render Fat: For those of you, who like I was, are unaware of the different methods of rendering, here is a basic description of the difference: Dry Render - A method in which you put the fat directly into a pot and render it slowly over low heat. Wet Render - A method in which you put the fat into a pot with water (and optional salt) and render it slowly over low heat. The idea is that the the fat cooks in the water (indirect heat) rather than in the pot itself (direct heat). This method is said to make the fat less likely to burn and to minimize the flavor and odor of the tallow (or lard). Why Render Tallo...

Project Updates - Winter 2025

Image
It has been a while since we have done project updates. Here are some of the things we have been up to since the last update in early October. It is a bit of a long list since it has been so many months: Canning Turkey Beef Potatoes Pineapple Juice Cranberry Juice Beans Broth Pears Pear Sauce Apple Sauce Apple Pie Filling Hot Sauce Tomato Sauce Butternut Squash Mixed Berry Jam Dehydrating  Microgreens Green Peppers Calendula Blueberries Freezing Butternut Squash Spaghetti Squash Ham Broth Diced Ham Applesauce Other Homestead Projects Baby quilts Dinner Napkins Knit Baby Hats, Scarf, and Gloves Draft Stoppers Rendering Lard Rendering Tallow Vacuum Sealing Dry Goods Emergency Oil Lamps Candle Painting Homemade Christmas Ornaments   New Website Articles Your Go Bag Tom & Jerry Mix Homemade Chai Spice Mix Hot Cocoa Mix Emergency Lamps Canning Fruit Juices Our Experience Canning Cranberry Juice What projects have you been working on since last October? We would love to hear you...

Five Ways to Use Extra Juice

Image
A while back, we juiced a watermelon that was given to us. Out of one watermelon we got 1 ½ gallons of juice. We drank it for a couple of days, but since we don’t drink a lot of fruit juice to begin with, it was quite a lot for the four of us. We started thinking of ways to use it up or preserve it. While not all of these may work with all juices, here are some ways that you might be able to use your extra juice: Mix it in a smoothie – Fruit juice smoothies are refreshing and can be a good way to use up juice and get extra protein in your diet. Make a mixed drink or add to punch – Many juices can be made into mixed drinks or added to a non-alcoholic punch that everyone can enjoy. Blend with other juices for a juice cocktail – If you are just getting bored with plain juice, try blending it with other juices or add to lemonade to create a different flavor. Freeze as ice cubes – Pour it into ice cube trays to put in your juice, punch, lemonade, sangria, or mixed drinks down the road...

Eight Ways to Use Greens

Image
We had some leftover greens (beet greens, Swiss chard, kale, etc.) and some microgreens we had purchased that were getting older and were in danger of spoiling. We didn’t want to waste them, so we popped them in the dehydrator. I thought that if we can make zucchini flour for baked goods, why not power green powder and dehydrated microgreens for soups and smoothies? This got us thinking about ways to use extra greens. Below are some of the ideas we came up with.  Add them to your salad Dice and use as garnish for your main meal Slice and toss into a soup Make vegetable broth, add to meat broth, or add to bone broth Blend into a smoothie Dehydrate for a healthy chip alternative (large leaf greens) or for adding to soups and casseroles  Dehydrate and pulverize to make a green powder Freeze them for later use (Note:  Some of these will not work well for lettuce.) Powdered Greens and Dehydrated Microgreens

Preparedness Thoughts

Image
As stories came out of North Carolina following the hurricane, there were a number of videos people posted listing things they wish they would have had on hand or things they wish they would have done before the hurricane that could have helped them through the first few days. If you have decided to take the next step in your preparedness journey (no matter where you are at now), I encourage you to look up a few of these videos from people who have lived it - they are certainly more experienced than many, and they have a lot to teach us. A Few Takeaways from the Flood Videos Here are a few highlights from what was said: 1) You can prepare for a disaster and still loose everything. Prepare anyway - you may end up being one of the few in a position to help your neighbors. 2) It is nearly impossible to be completely prepared for every possible scenario.  3) If you can afford it, a generator is wonderful to have, but only if you have enough fuel stored to run it. 4)  Store water. ...

Project Updates - End of Summer

Image
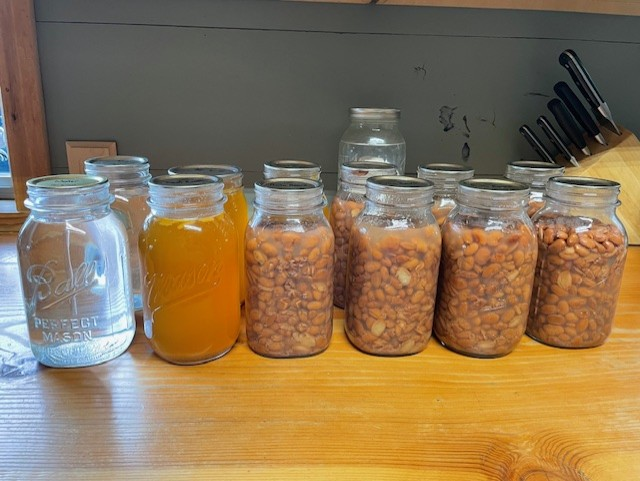
It has been a while since we have updated on projects in our household. Here are a few things we have been up to since the last update in July: Canning Dill pickles Dilly beans Dill relish Peaches Pears Victoria sauce Peach pie jam Hawthorn berry jam Pinto beans Beef stew Apple pie filling Dehydrating  Greens for powdered greens Zucchini for zucchini flour Microgreens for soups Herbs for culinary use and tea Green bell peppers Freezing Peaches Applesauce Broth Green bell peppers Other Homestead Projects Refrigerator pickles Lacto-fermented pickles Baby quilt New Website Articles Using a Jar Vacuum Sealer Getting the Most Out of Your Root Vegetables Why Prepare? Your Vehicle Emergency Bag Cherry BBQ Sauce Recipe

Budget Stretching Ideas - Fruit

Image
Getting the Most Out of Your Fruit When stretching your budget, it helps to think outside the box and put items you might normally toss to use. Instead of throwing away your apple cores, lemon rinds, banana peels, and strawberry hulls, use them to make something new! Here are some items you can make with those peels, rinds, and cores. Be sure to wash the fruit well before using to remove any dirt or impurities. If you are using non-organic produce, you will need to remove the wax coating from the fruit before using the peels and rinds. Here is a post that explains why you should remove the wax coating and how to safely remove it. Juice Strawberry tops (or hulls), peach peels, and apple peels (and cores) can all be simmered in water to make a light juice. This can then be turned into syrup, used in smoothies, or enjoyed straight. Just add your clean scraps to a pot. Pour enough water over them just to cover. Bring to a boil then reduce immediately to a simmer. Let simmer for 20-30 minut...

Essential Canning Tools

Image
We do a lot of canning at our house. For one, I really enjoy it. Other reasons we do it include saving money, making healthy alternatives to store-bought food, having easy meals on the shelf, and having a full larder in case of hard times. If you are new to canning and are wondering what you need, here are a few essentials that we use consistently in preparing our canned goods.  Note: This blog post contains affiliate links. Purchasing through these links helps support our website and blog at no cost to you. Thank you for your support. Items you will likely need to get if you have never canned before: Presto Pressure Canner  - You can purchase a water bath canner and/or a pressure canner, but I prefer the pressure canner because it gives you more options. You can water bath can and pressure can using only one canner rather than having a separate canner for each purpose. This saves on shelf space. Furthermore, the pressure canner has a nice flat bottom rack, unlike the old wate...

The Week in Review

Image
This past week was a fruitful one on the prepping/canning front. It also exemplifies a typical week during harvest and canning season. Here is what it looked like: Note: This blog post contains affiliate links. Purchasing through these links helps support our website and blog at no cost to you. Thank you for your support. Monday On Monday, I had the opportunity to pick up some apples in town that a friend had. Since our eldest daughter is out-of-town, our youngest daughter and I made plans to try making apple juice with the steam juicer my mom handed down to me. It is a much older version of this one . My mom has made many different juices with this over the years, but the two I remember most are plum and grape. I have used these canned juices to drink, make jelly, make juice pops, and make homemade jello.  Tuesday The peaches we ordered arrived and on Tuesday I canned my first batch. A few were a bit green yet, but since I was going to the work of canning them, I wanted to be su...